Essential Backwater Valve Maintenance for Homeowners
Backwater valves are one of the most overlooked heroes in protecting your home from sewage backups. Every year, Canadian homeowners spend thousands on repairs after avoidable basement floods caused by faulty or neglected backwater valves . Most people stock up on sandbags and sump pumps, but they skip the simple step of regular valve maintenance that could save a fortune. It turns out, just a few minutes each season with the right tools can make all the difference between a dry basement and a costly disaster.
Table of Contents
Quick Summary
| Key Point | Explanation |
|---|---|
| 1. Gather essential maintenance supplies | Collect tools like a flashlight, adjustable wrench, and cleaning materials to prepare for the maintenance process. |
| 2. Locate and inspect the backwater valve | Find the valve in your home, typically near the sewer line exit, and check for corrosion or damage. |
| 3. Clean the valve mechanism thoroughly | Use mild detergent to remove debris and buildup, ensuring all components are clean and functioning. |
| 4. Test the valve for proper functionality | Simulate water pressure to assess valve sealing and movement; document observations during testing. |
| 5. Document maintenance and schedule checks | Keep a log of maintenance activities and set reminders for biannual inspections to ensure ongoing valve health. |
Step 1: Gather Your Maintenance Supplies
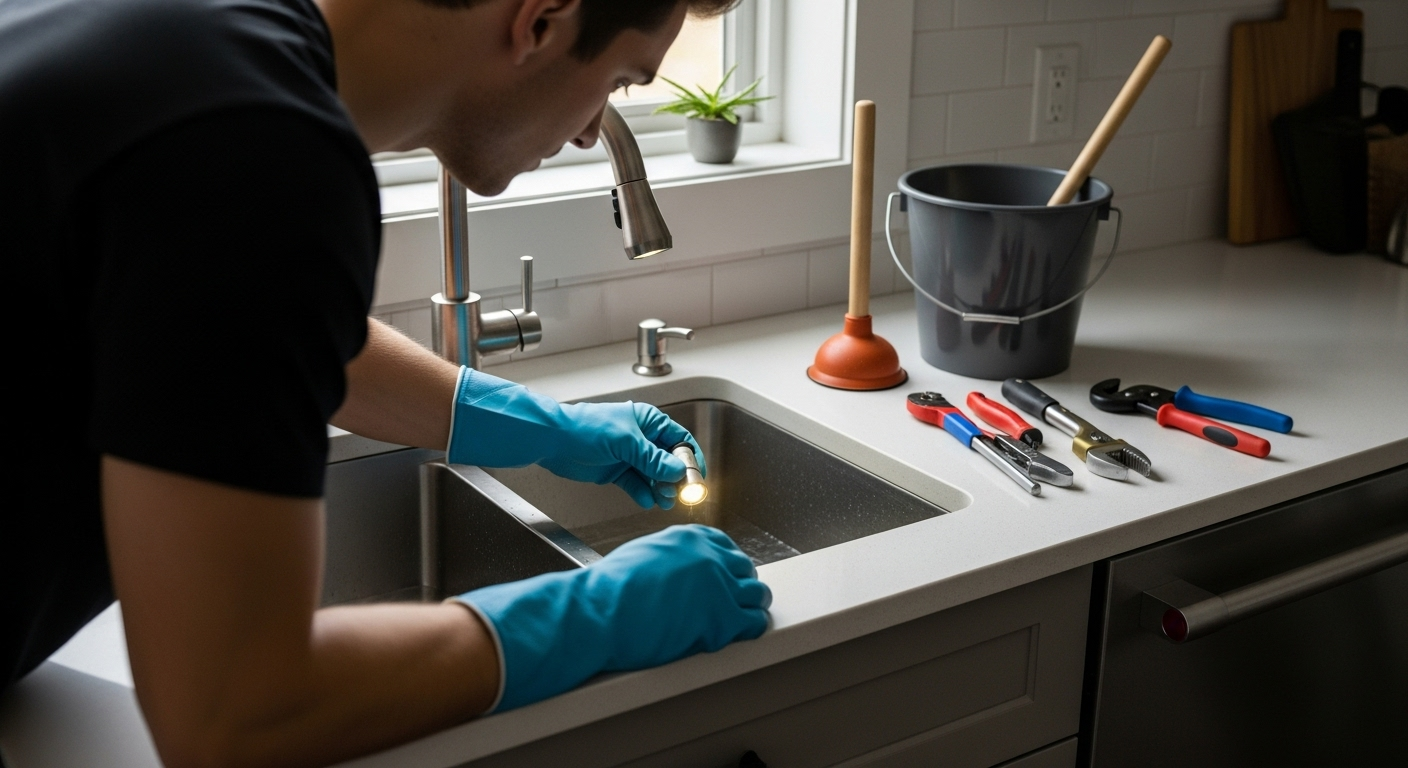
Preparing for backwater valve maintenance requires strategic planning and the right tools. Before diving into the actual maintenance process, assembling a comprehensive set of supplies will make your task smoother and more efficient. Homeowners who take time to gather appropriate equipment can prevent potential complications and ensure a thorough inspection and maintenance routine.
To begin, you will need several key tools and protective gear to perform a comprehensive backwater valve maintenance check. Safety should always be your primary concern . Start by collecting basic plumbing inspection tools such as a reliable flashlight with strong battery life, protective rubber gloves, safety glasses, and a sturdy knee pad for comfortable positioning during inspections. These items will help you navigate potentially dark and tight spaces around your valve system with confidence and protection.
Your toolkit should include specialized plumbing instruments that facilitate a detailed examination. Acquire an adjustable wrench, pipe wrench, screwdriver set with multiple head types, and a measuring tape. A moisture meter can be particularly helpful in detecting potential water infiltration issues around your backwater valve. For cleaning purposes, prepare a bucket, mild detergent, soft-bristled brush, and clean rags. Having our guide on plumbing maintenance tools nearby can provide additional insights into selecting the right equipment.
Consider purchasing a high-quality camera or smartphone with good resolution to document the valve’s condition before and after maintenance. Visual documentation helps track changes over time and can be valuable if you need professional consultation. Ensure your documentation includes clear, well-lit images showing the valve’s overall condition, potential wear points, and any observable damage.
While gathering supplies, remember that each backwater valve system might have unique requirements. If your home has a particularly old or complex setup, you might need specialized tools or replacement parts. Keep manufacturer documentation or original installation records accessible during your maintenance process. This preparation ensures you have a comprehensive understanding of your specific valve system before beginning any maintenance work.
Refer to the table below to quickly see the essential tools and supplies required for effective backwater valve maintenance, along with their main purposes.
| Tool/Supply | Purpose |
|---|---|
| Flashlight | Illuminate dark inspection areas |
| Protective rubber gloves | Protect hands from debris and contaminants |
| Safety glasses | Shield eyes during inspection and cleaning |
| Knee pad | Provide comfort when working in tight spaces |
| Adjustable wrench | Remove access covers and fittings |
| Screwdriver set | Disassemble valve components if needed |
| Soft-bristled brush | Gently clean valve surfaces and seals |
| Mild detergent | Safely remove sediment and buildup |
| Clean rags | Dry valve parts to avoid moisture issues |
| Camera/smartphone | Document valve condition for records |
| Maintenance log/notebook | Track inspection and cleaning activities |
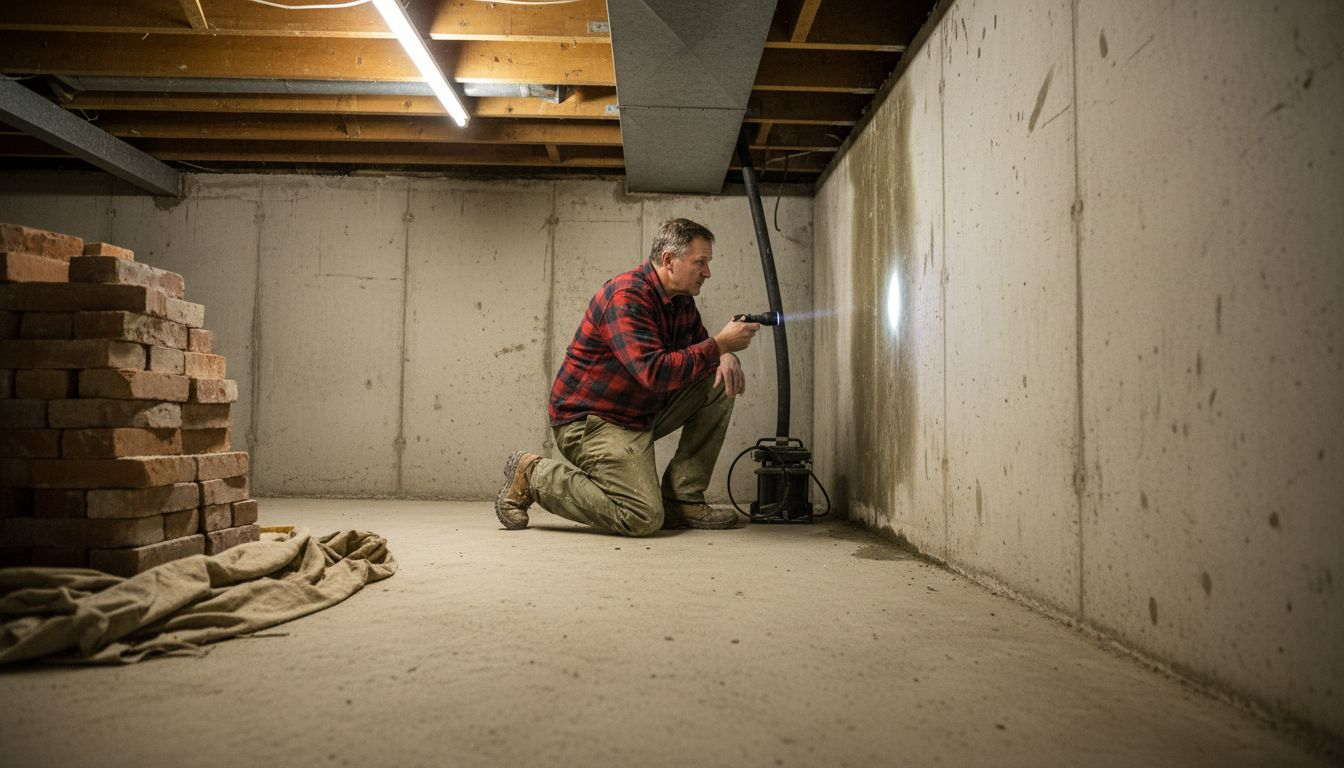
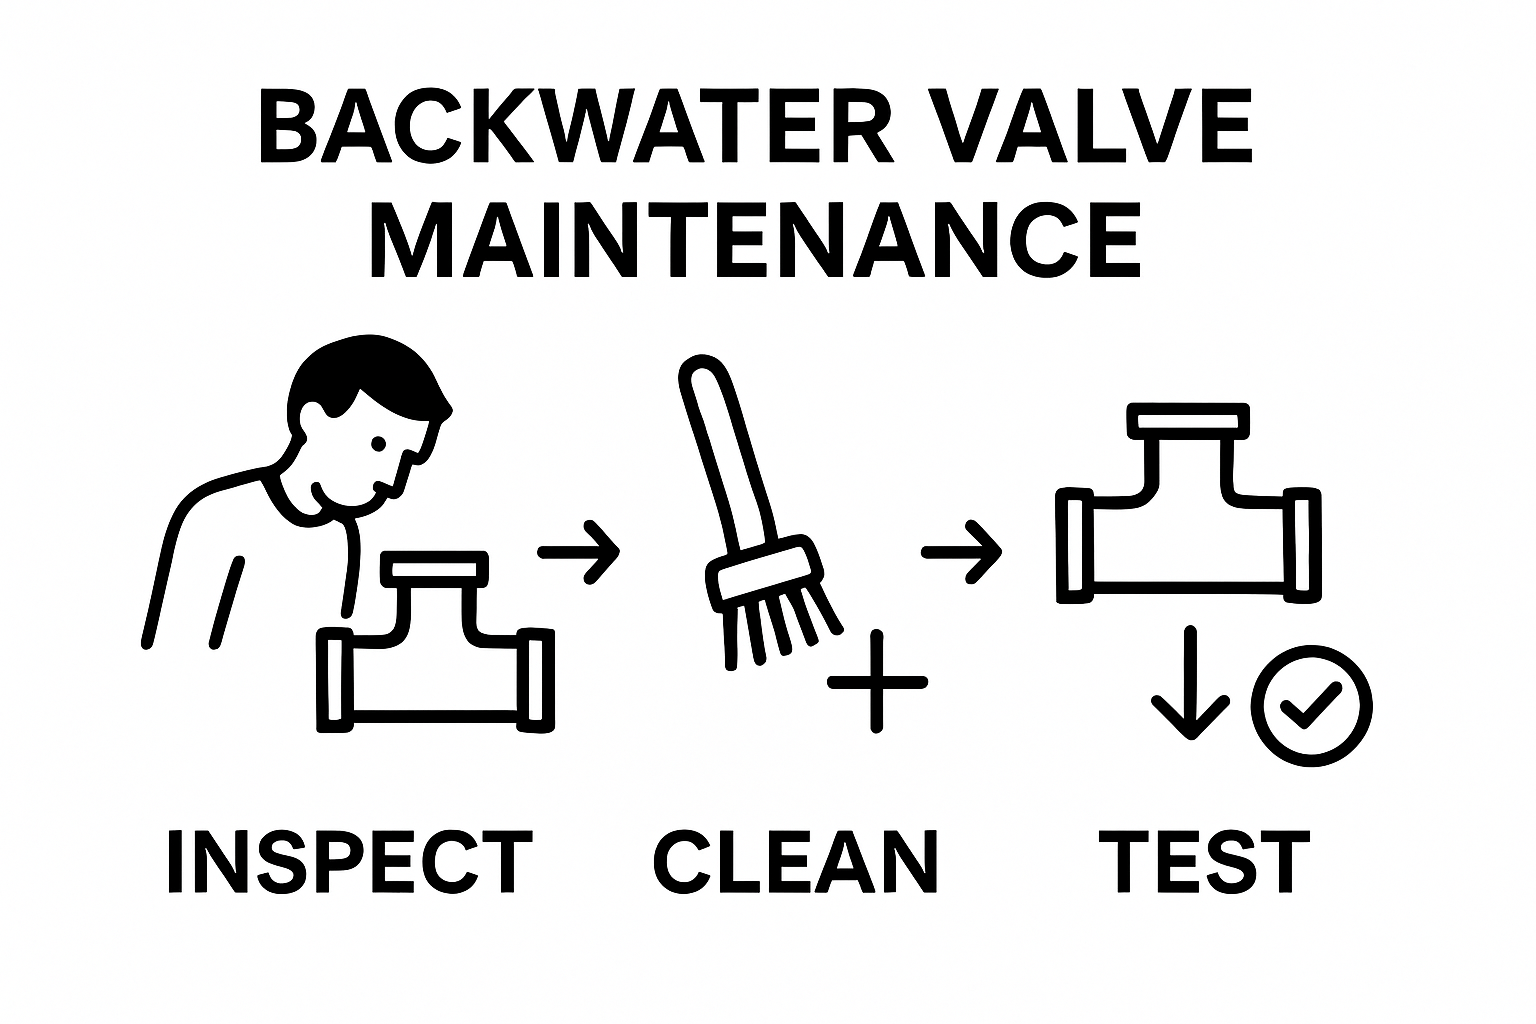
Step 2: Locate and Inspect Your Backwater Valve
Locating and inspecting your backwater valve is a critical step in maintaining a healthy home drainage system. Most homeowners are unfamiliar with their valve’s exact location, which can complicate maintenance efforts. Typically, backwater valves are situated where your home’s main sewer line exits the foundation, often in basement areas, crawl spaces, or exterior underground access points.
Start by gathering your flashlight and protective gloves from the previous preparation step . You will need to carefully investigate potential locations, paying close attention to areas near your basement floor drain or where your primary sewer line enters your home’s foundation. Look for a circular access cover or a small metal lid that might indicate the valve’s location. Some homes have these valves in utility rooms, while others might have exterior access points marked by small inspection covers.
Carefully remove the access cover using your adjustable wrench, taking care not to damage surrounding components. Once exposed, perform a thorough visual inspection of the valve mechanism. Watch for signs of corrosion, mineral buildup, or physical damage that could compromise the valve’s functionality . Check the valve’s moving parts to ensure they can open and close smoothly without obstruction. A properly functioning backwater valve should have clean seals and no visible rust or degradation. Learn more about professional backwater valve installations to understand what optimal condition looks like.
During your inspection, document everything. Take clear photographs showing the valve’s overall condition, focusing on potential problem areas. Note any unusual sediment, discoloration, or mechanical issues. If you observe significant wear or suspect potential malfunction, it might be time to consider professional evaluation. Pay special attention to the valve’s rubber seals and mechanical components, as these are often the first areas to show signs of potential failure.
Verification is key to this step. Your inspection should confirm the valve’s location, assess its current condition, and identify any immediate maintenance needs. A successful inspection means you have a clear understanding of your backwater valve’s health and are prepared for the next maintenance steps. Remember, early detection of potential issues can save significant time and expense in future repairs.
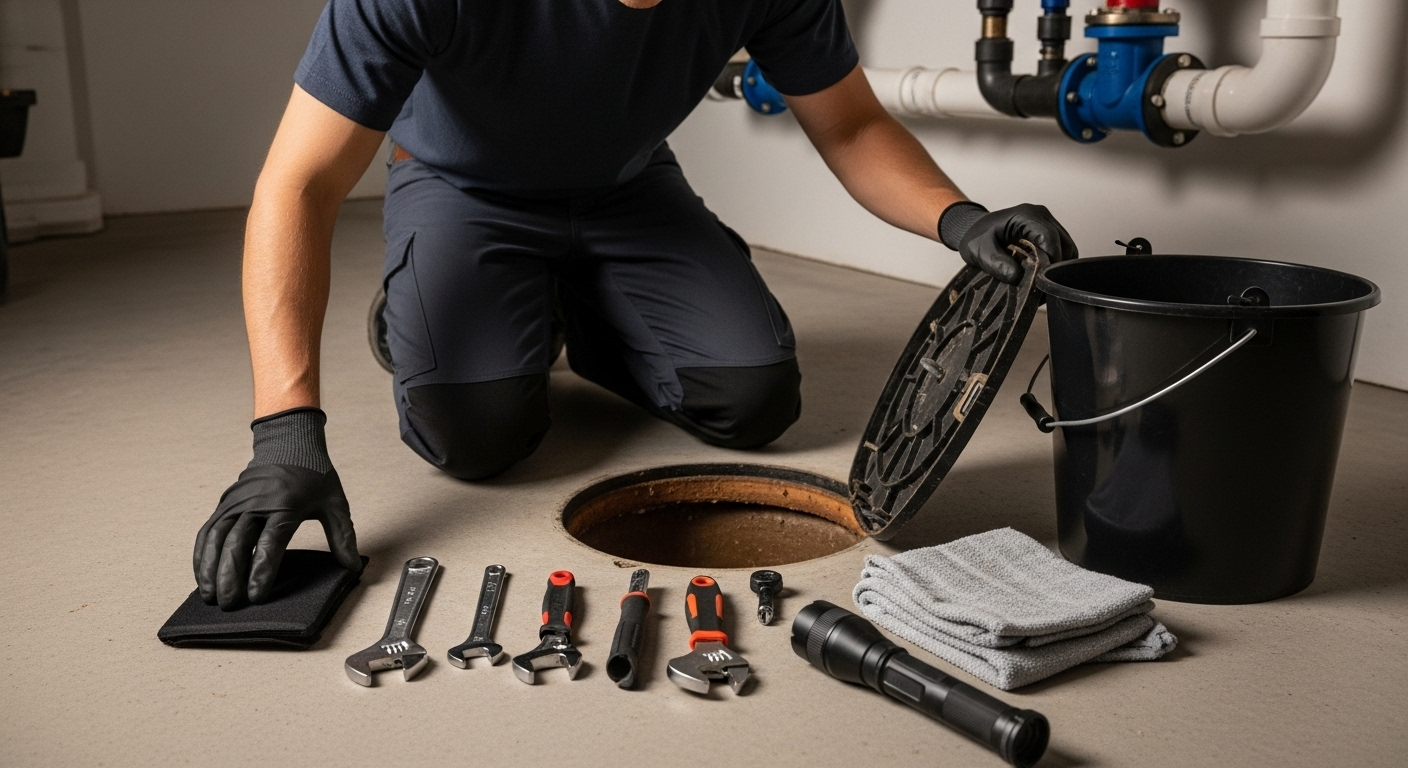
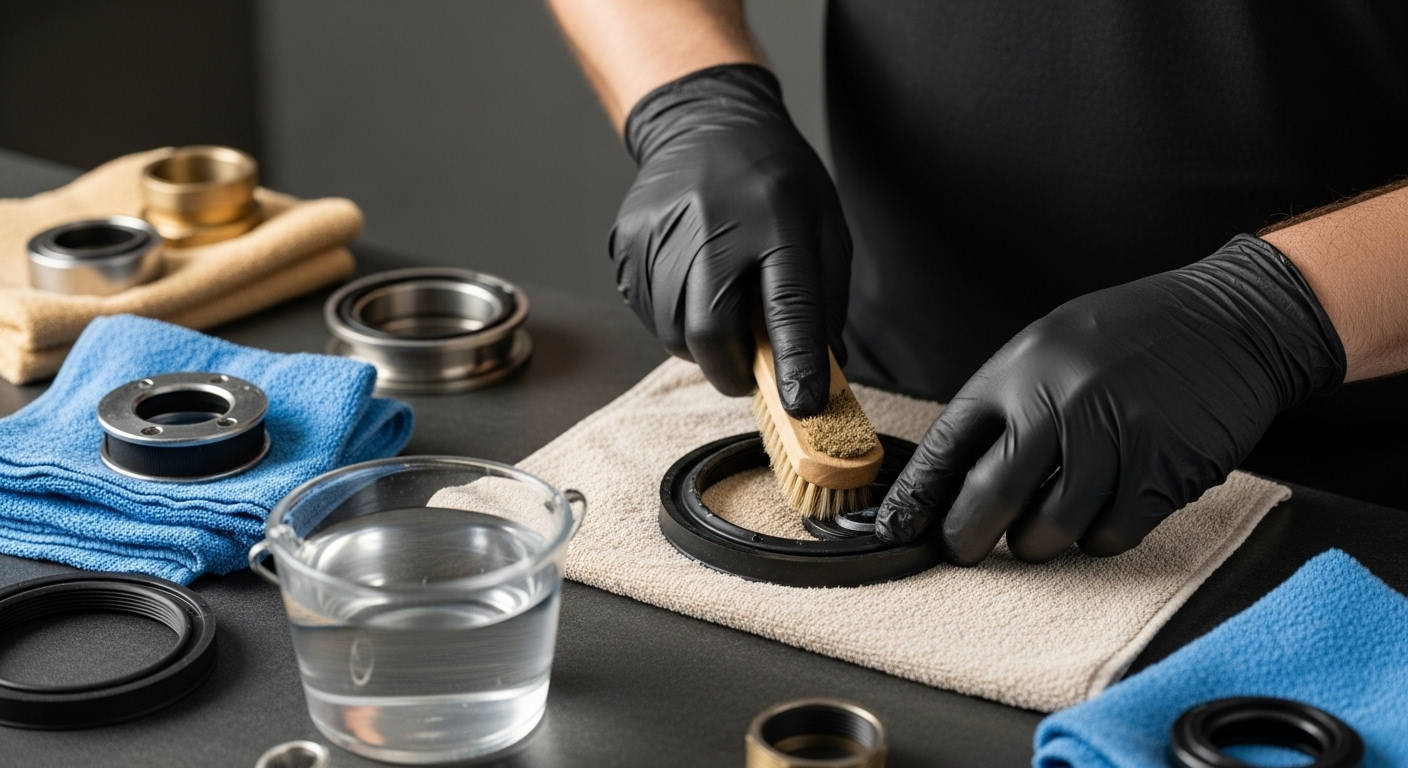
Step 3: Clean the Backwater Valve Mechanism
Cleaning your backwater valve mechanism is a crucial maintenance step that prevents potential blockages and ensures smooth operation. After locating and inspecting the valve in the previous step, you are now ready to perform a thorough cleaning that will help maintain its effectiveness and extend its operational lifespan.
Begin by preparing a clean workspace and gathering your cleaning supplies . You will need mild detergent, warm water, a soft-bristled brush, clean rags, and protective gloves. Avoid using harsh chemical cleaners or abrasive materials that could damage the valve’s delicate components. Carefully remove any visible debris around the valve using your soft brush, paying special attention to the seals and moving parts. Gently wipe away sediment and buildup, ensuring you do not push dirt further into the mechanism.
Carefully disassemble the valve components according to manufacturer instructions. If you are uncertain about disassembly, consult our professional backwater valve maintenance guide for detailed guidance. Use your soft brush and mild detergent solution to clean each component thoroughly. Focus on removing mineral deposits, sediment, and any potential biological growth that could impede the valve’s functionality . Rinse each part with clean water, ensuring no soap residue remains. Pay particular attention to the valve’s rubber seals and moving parts, as these are most susceptible to performance-reducing buildup.
Once cleaning is complete, dry each component meticulously using clean rags. Moisture can lead to corrosion and potential mechanical issues, so thorough drying is essential. Reassemble the valve mechanism carefully, ensuring all parts are correctly positioned and moving smoothly. Test the valve’s movement manually, checking that it opens and closes without resistance.
 Your cleaning process should restore the valve’s smooth operation and remove any potential obstacles that could compromise its performance.
Verification is key to completing this maintenance step. A successful cleaning means the valve mechanism moves freely, appears clean and undamaged, and shows no signs of residual buildup. Take a moment to visually inspect your work, confirming that all components are correctly reinstalled and functioning as expected. This careful approach ensures your backwater valve remains a reliable defense against potential sewage backups.
Step 4: Test the Valve Functionality
Testing your backwater valve’s functionality is a critical step that determines whether your home’s drainage system can effectively prevent potential sewage backups. After cleaning the valve mechanism, you will now verify its operational integrity through a systematic and careful testing process. This step ensures that all your previous maintenance efforts have successfully prepared the valve for potential emergency scenarios.
Begin by simulating potential water pressure conditions that might trigger the valve’s protective mechanism . Using a controlled water source, carefully introduce water flow that mimics potential backup scenarios. This can be accomplished by gradually pouring water near the valve or using a garden hose to create controlled water pressure. Watch the valve’s response closely, observing how smoothly it closes when water attempts to flow backward. Our professional backwater valve installation specialists recommend paying attention to the valve’s sealing capability during this test.
Manually operate the valve several times to confirm its mechanical responsiveness. Using clean hands or protective gloves, gently manipulate the valve’s mechanism, checking for smooth movement without excessive resistance. Look for any signs of sticking, unusual sounds, or incomplete closure that might indicate potential future problems . The valve should move consistently and seal completely when pressure is applied from the reverse direction. Document your observations, noting any areas of concern or unexpected behavior during the testing process.
Verification involves multiple assessment criteria. A successfully tested backwater valve will demonstrate several key characteristics: smooth mechanical movement, complete and tight sealing when backpressure is applied, no visible leakage, and consistent performance across multiple test cycles. Take photographs or video documentation of the valve’s operation, which can serve as a useful reference for future maintenance or potential professional consultations. Pay special attention to the valve’s rubber seals and moving parts, ensuring they respond precisely as designed.
Conclusive testing means you have comprehensive confidence in your backwater valve’s ability to protect your home from potential sewage backups. If you observe any irregularities during testing, such as incomplete closure, unusual sounds, or visible wear, consider consulting a professional plumbing service for a more detailed assessment. Your thorough approach to testing represents a proactive step in maintaining your home’s critical drainage infrastructure.
Step 5: Document Maintenance and Schedule Regular Checks
Documenting your backwater valve maintenance is a crucial final step that transforms your isolated maintenance effort into a comprehensive long-term home protection strategy. Proper documentation helps you track the valve’s condition, anticipate potential issues, and maintain a systematic approach to preventing drainage problems. This step is about creating a reliable record that will serve as a valuable resource for future maintenance and potential professional consultations.
Start by creating a dedicated maintenance log specifically for your backwater valve . Use a durable notebook or digital spreadsheet to record detailed information about each maintenance session. Include critical details such as the date of inspection, specific cleaning and testing procedures performed, observations about the valve’s condition, and any unusual findings. Explore our comprehensive guide on home plumbing maintenance for additional insights into systematic home maintenance tracking.
Establish a consistent maintenance schedule that aligns with professional recommendations. Most homeowners should plan for comprehensive backwater valve inspections at least twice annually, typically during spring and fall seasons. These biannual checks allow you to assess the valve’s condition before and after periods of potential heavy rainfall or significant weather changes. Mark these maintenance dates on your calendar and set digital reminders to ensure you do not overlook this critical home protection task. Your documentation should include not just maintenance records, but also photographs documenting the valve’s condition over time, allowing you to visually track any gradual changes or potential deterioration.
Create a comprehensive maintenance kit that includes all necessary documentation, tools, and reference materials . This kit should contain your maintenance log, manufacturer’s instructions, photographs from previous inspections, and a list of emergency contact information for professional plumbing services. Consider storing digital copies of these documents in a cloud storage service to ensure they remain accessible even if physical documents are lost or damaged. By maintaining a thorough and organized approach to backwater valve maintenance, you transform a potentially complex task into a manageable, predictable home maintenance routine.
Verification of this step means you have a clear, comprehensive system for tracking and scheduling backwater valve maintenance.
Below is a checklist summarizing key verification steps to ensure your backwater valve maintenance is thorough and successful.
| Verification Step | What to Check | Purpose |
|---|---|---|
| Confirm all supplies gathered | All required tools and safety gear collected | Enables smooth and safe maintenance |
| Locate valve access point | Identify correct valve location based on home layout | Prevents wasted time searching |
| Inspect for visible issues | Check for debris, corrosion, or damage | Detects problems early |
| Clean all valve components | Remove sediment and buildup from mechanism | Ensures smooth operation |
| Test valve movement | Valve opens and closes freely by hand | Confirms functionality |
| Simulate water pressure | Valve closes and seals under backflow scenario | Validates backflow protection |
| Document condition | Take photos and note findings | Tracks history for trends |
| Schedule next inspection | Set calendar reminder for next check | Maintains regular upkeep |
| Your documentation provides a historical record of the valve’s condition, creates accountability for regular checks, and gives you peace of mind knowing you are proactively protecting your home from potential drainage disasters. |
Worried About Your Backwater Valve? Get Lasting Protection With Toronto’s Most Trusted Plumbers
You already know the risks that come with missed backwater valve maintenance. Even a small oversight can mean costly repairs and disrupted peace of mind. If your inspection or cleaning uncovers leaks, wear, or a stubborn valve, it is time to call in help you can count on. Homeowners across Toronto trust DrainWorks Plumbing for genuine expertise in backwater valve solutions and full drain protection. We have more than 30 years of experience keeping homes safe from sewage backups and related disasters.

Do not wait for the next heavy downpour or system backup to test your luck. Whether you need a professional installation, a camera inspection, or a full assessment of your drain system, DrainWorks Plumbing is ready to help. Book your same-day service and experience our award-winning, up-front pricing. If you are ready for lasting peace of mind, start with our backwater valve installation experts or see all plumbing services for homeowners . Take action now and protect your home before the next emergency hits.
Frequently Asked Questions
What tools do I need for backwater valve maintenance?
To maintain a backwater valve, you will need safety gear such as gloves and safety glasses, basic plumbing tools like an adjustable wrench and screwdriver set, a flashlight, and cleaning supplies including mild detergent and a soft-bristled brush.
How often should I clean and inspect my backwater valve?
It is recommended to inspect and clean your backwater valve at least twice a year, typically during the spring and fall, to ensure it remains functional and to prevent potential sewage backups.
What are the signs that my backwater valve needs professional attention?
Signs that your backwater valve may need professional evaluation include visible corrosion, mineral buildup, difficulty opening or closing the valve, leaks, or unusual sounds during operation. If you notice any of these issues, consult a plumbing professional.
How can I test if my backwater valve is functioning properly?
You can test the valve by simulating water pressure that might cause a backup, observing if the valve closes smoothly. Manually operate the valve to ensure it opens and closes without resistance, and document any irregularities in its performance.
Recommended